How to Build a Shower Over Concrete
Learning how to build a shower over concrete gives you the freedom to turn a plain bathroom slab into a clean, durable, and modern shower space. Many homeowners feel unsure where to start, especially when dealing with uneven slabs, old plumbing, and moisture control. That’s why pairing this process with proven methods for how to waterproof a bathroom floor is essential for preventing long-term water damage and ensuring a reliable shower foundation.
The process becomes much easier once you understand the order of preparation, from bold building a shower floor on concrete bold to proper bold concrete shower base preparation bold that ensures the tile and waterproofing bond correctly. Even small jobs require careful attention to details like bold installing a shower drain in concrete bold so water flows smoothly without damaging the slab.
Tools and Materials You Need Before Starting the Build

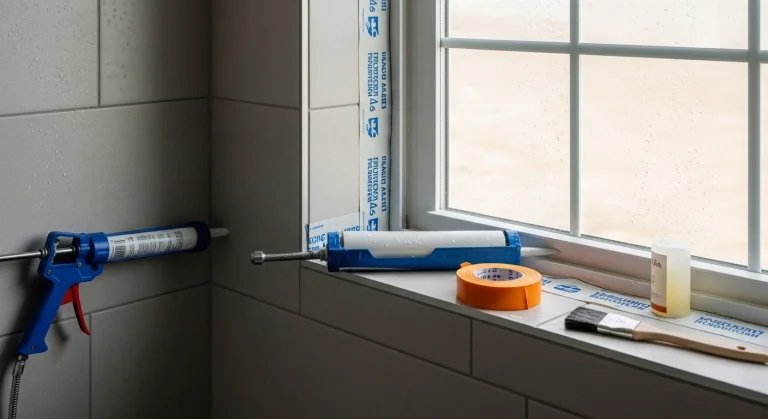
Before you begin learning how to build a shower over concrete, gathering the right tools and materials helps avoid delays and costly mistakes. Many DIY builders choose between a mortar bed system or installing a prefabricated base, which makes guidance on how to install a shower pan base especially useful when working directly over a concrete slab. The materials you select will determine the drain system, waterproofing membrane, and bonding method required for a long-lasting installation.
These items help ensure the foundation is ready for tile installation and prevent long-term water damage. Most standard tools include angle grinders, trowels, mixing paddles, and waterproofing rollers along with bonding agents and mortar products approved for USA construction. As you gather the supplies, you should consider whether you’ll use shower pan installation on concrete or a traditional mortar bed over concrete slab, because these choices determine what type of drain assembly, thinset, and waterproofing system you will need.
Fixing Cracks, Leveling, and Preparing the Concrete Base

A major part of how to build a shower over concrete involves repairing cracks, leveling the slab, and preparing the surface for waterproofing. Moisture issues uncovered during this stage can sometimes point to problems beyond the shower area itself, especially in older homes. In some cases, homeowners discover ceiling damage below bathrooms, making resources like how to repair a plaster ceiling helpful when addressing signs of past leaks before moving forward.
Small cracks can be filled with flexible patch materials, while deeper cracks require epoxy injection. During this stage, homeowners often find themselves asking “How long does concrete need to cure before waterproofing? The answer depends on the type of repair, but many products cure within hours or days, making it easier to move forward with the installation.
Once the cracks are repaired, the surface must be leveled to avoid pooling water and uneven tile. Proper leveling concrete for shower build requires grinding down high spots and filling low spots with self-leveling cement. After this process, you must think about the slope of the shower floor, because how to slope a shower floor on concrete determines whether water flows smoothly to the drain.
USA building standards require a quarter-inch of slope for every foot of distance. Leveling and slope correction are essential before the waterproofing step because mistakes here create the most common mistakes when building showers on concrete, such as improper drainage or puddles forming near the walls.
Installing the Drain System on a Concrete Floor

Correct drain placement is one of the most technical steps in how to build a shower over concrete. When setting drain height and alignment, many homeowners realize that their choice of base affects the entire system. This is where understanding how to install a shower pan base becomes valuable, especially when transitioning from concrete slab to a waterproof shower floor that drains efficiently and meets US building standards.
Many homeowners need help learning how to attach a drain to concrete slab, which usually involves breaking a small area of concrete around the pipe to adjust the height and ensure proper alignment. This is also where people ask **“How to connect shower drain in basement slab?” because basement plumbing often requires new P-traps and venting adjustments that must follow US shower building code requirements.
During this stage, accurate drain placement for concrete shower builds matters more than most beginners realize. A drain that sits too low will interfere with the mortar bed, while a drain that sits too high will prevent the tile from aligning. You should also ask yourself **“Do I need a shower pan over concrete?” because the answer affects how the drain assembly fits into the system.
Creating a tight seal is one of the best ways to prevent leaks, and this is why experts recommend using drain systems compatible with your chosen waterproofing membrane. Understanding these details allows your shower foundation to function efficiently and safely.
Choosing Between a Shower Pan or a Custom Mortar Bed

When deciding how to build a shower over concrete, homeowners often choose between a prefabricated pan or a custom mortar bed. Prefab systems simplify installation and pair well with lightweight enclosures, making how to install a fiberglass shower a practical next step for faster remodels. Custom mortar beds, however, offer flexibility for tiled showers and unique layouts, especially in high-end bathroom renovations.
A prefab pan is easier and faster because shower pan installation on concrete only requires leveling and proper bonding. These pans come in fiberglass, foam, or composite materials and work especially well in DIY projects. They eliminate the guesswork around slope and create a waterproof surface quickly.
On the other hand, many professionals prefer a mortar bed over concrete slab, especially for custom showers. A mortar bed allows greater flexibility in size, shape, and slope adjustments. USA contractors say **“How thick should a mortar bed be for a shower?” is a question they hear often, and the standard is usually between one and two inches depending on the drain height and slope. Custom mortar beds are especially useful when you want a custom tiled shower over concrete with luxury finishes or unique layouts. While prefab pans save time, mortar beds create custom craftsmanship that many homeowners prefer.
Waterproofing Concrete the Right Way

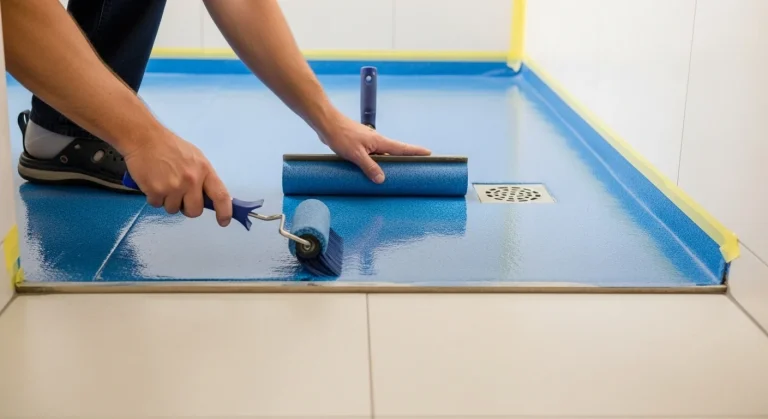
Waterproofing is the most critical part of how to build a shower over concrete because concrete naturally absorbs moisture. Proper sealing protects not only the slab but also nearby structures such as walls and windows. Bathrooms with exterior windows benefit from additional protection, making waterproof window tile shower techniques especially relevant when designing a fully sealed shower system.
Many homeowners compare the best way to waterproof a concrete shower and often choose between liquid membranes and sheet membranes. Liquid membranes like RedGard create a smooth, paint-on barrier, while sheet membranes used in the Schluter system for concrete floors offer a pre-engineered waterproof layer. In all cases, make sure to ask yourself **“Should concrete be sealed before shower installation?” because some products require pre-sealing while others bond directly to the slab.
During waterproofing, homeowners often wonder **“How long does concrete need to cure before waterproofing?” and the answer depends on whether repairs or leveling compounds were used. Most products require at least 24 hours of drying time. The waterproofing layer must be completely sealed before moving to tile installation. Missing a single corner or drain connection is one of the most common mistakes when building showers on concrete, so precision is essential. With proper waterproofing, you create a barrier that keeps water from ever reaching the slab.
Building the Shower Curb on a Concrete Floor

A shower curb plays a major role in stopping water from spilling onto the bathroom floor, and understanding its construction is essential when learning how to build a shower over concrete. Many USA homeowners attempt shower curb construction on concrete using wood, but professionals strongly recommend using foam or concrete blocks instead. Wood can absorb moisture from the slab, causing rot and expansion over time.
Concrete-based curbs offer stability and resist moisture naturally. When creating the curb, you have to maintain the correct internal slope to guide water back toward the drain and prevent standing water along the shower’s edge. This is also when homeowners revisit the question **“Is a vapor barrier required under a shower?” especially for basement installations, because moisture travels upward through concrete easily.
After building the curb, you must include it in your waterproofing system. Many installers choose RedGard because RedGard waterproofing on concrete bonds tightly and forms a seamless coating, making it easier to waterproof the curb and floor together. Others choose sheet membranes because they provide pre-formed corner pieces that prevent leaks.
Once the curb is waterproofed, you can move to tile preparation. At this point, many people search online for **“What to do before tiling a concrete shower?” so they can verify that everything is sealed correctly. Ensuring the curb is stable, waterproof, and bonded properly is key to preventing future water damage.
Installing Tile Over Concrete (Floors + Walls)

Tile installation is where the shower begins to look finished, and many homeowners learning how to build a shower over concrete enjoy this stage the most. Before placing tile, contractors evaluate whether the concrete is ready by using how to check if concrete is level for a shower, ensuring that the tile won’t wiggle, shift, or crack later.
Many homeowners ask **“Can you tile straight onto concrete?” and the answer is yes if the concrete is clean, primed, and waterproofed correctly. Thinset mortar must match the waterproofing system, and choosing the best thinset for concrete shower floors ensures a long-lasting bond. USA professionals use modified thinset for most concrete installations, because it provides a strong grip even in wet areas.
During tile installation over concrete shower base, layout planning is essential. Tile must align with the drain, curb, and walls while maintaining consistent spacing. Homeowners often ask **“What to do before tiling a concrete shower?” so they can check that waterproofing is complete and cured.
Proper tile installation prevents water pockets and protects long-term durability. When installing larger tiles, slope variation becomes more challenging, which is why many professionals prefer smaller tiles around the drain to maintain proper angles and avoid the most common mistakes when building showers on concrete. After the tiles are placed and cured, grouting and sealing help finalize the waterproofing system.
Finishing Touches: Fixtures, Shower Doors & Sealing

As the shower nears completion, many homeowners combine functional upgrades with design improvements to create a cohesive bathroom. Projects like shelving, vanities, and storage upgrades often happen alongside shower remodels, which is why ideas such as turning a dresser into a bathroom vanity fit naturally into concrete-based shower renovations. Thoughtful finishing touches improve both usability and visual appeal.
Shower niches, shelves, grab bars, and accessories can be installed using strong anchors designed for tile surfaces, giving the shower more utility and comfort. At this point, many homeowners consider the cheapest way to build a shower over concrete while still achieving a high-quality finish, and the answer usually involves choosing mid-range fixtures with strong durability ratings instead of luxury materials.
Shower doors complete the enclosure. USA contractors measure carefully to ensure the door sits tightly against the curb. If the curb is not perfectly level, water may escape even with high-quality doors. To protect the entire installation, homeowners apply sealers over grout and tile surfaces to guard against moisture absorption.
This final sealing step supports the overall waterproofing concrete shower floor process. Many homeowners wonder **“How long does concrete need to cure before waterproofing?” or before sealing tile, but in most cases, grout requires at least 24 hours to set. Once complete, your shower becomes a durable and reliable part of your home.
Cost Breakdown & Timeline for Building a Shower Over Concrete

Understanding the total cost of how to build a shower over concrete helps homeowners plan smarter renovations. While shower construction focuses on moisture control and durability, budgeting alongside other major home projects can provide perspective. Comparing expenses with upgrades like how much a new roof costs helps homeowners prioritize improvements and manage long-term investment value.
Timelines vary depending on the drying periods between leveling, waterproofing, tiling, and grouting. Most projects take between seven and fourteen days when considering curing time and inspections. Homeowners often ask about the pros and cons of prefab shower pans vs mortar beds, and the choice affects both cost and timeline. Prefab pans require fewer steps, while mortar beds require detailed craftsmanship. Whichever method you choose, understanding these elements ensures a successful shower installation.
Conclusion
Learning How to Build a Shower Over Concrete gives you the power to transform a simple concrete slab into a safe, waterproof, and beautiful shower space. Once you understand the right order—inspecting the slab, repairing cracks, leveling, waterproofing, and installing the drain—the entire process becomes more predictable and far less stressful. A solid base and the right waterproofing methods ensure your shower will last for many years without leaks or damage.
Building a shower on concrete takes patience, planning, and attention to detail, but the results are worth it. Whether you choose a prefab pan or a custom mortar bed, the key is to follow proven steps and avoid shortcuts. When you combine proper preparation with quality materials, your concrete floor becomes the perfect foundation for a long-lasting, stylish shower. If you’re ready to upgrade your bathroom, start with confidence—you now know exactly how to do it right.
FAQs About How to Build a Shower Over Concrete
1. Can I build a shower directly on a concrete floor?
Yes, you can build a shower directly on concrete as long as the slab is repaired, leveled, and waterproofed correctly. Proper prep prevents leaks and future damage.
2. Do I need a shower pan over concrete?
A shower pan is not required, but it makes the installation easier and more leak-proof. Custom mortar beds work well if you want a fully tiled shower floor.
3. What is the best way to waterproof a concrete shower floor?
Use a liquid membrane like RedGard or a sheet membrane system such as Schluter. Both create a strong moisture barrier that protects the slab and tile.
4. How do I slope a shower floor on concrete?
Create a quarter-inch slope per foot toward the drain using mortar. This ensures water flows properly and prevents puddling in the finished shower.
5. How much does it cost to build a shower over concrete in the USA?
Most projects cost between $2,500 and $9,000 depending on tile quality, labor rates, and whether you use a prefab pan or a custom mortar bed.